Are you struggling to keep track of assignments, projects, and study schedules? Notion might be exactly what you need! This powerful all-in-one workspace helps you organize your academic life in one place. With Notion’s user-friendly design, you can create customized study spaces that fit your unique learning style. In this guide, I’ll walk you through on how to set up your own Notion account and show you how it can transform your student experience from chaotic to controlled.
Sign Up for Notion
Before you can start organizing your class notes and assignments, you’ll need to create your Notion account. The process is quick and designed to get you up and running in minutes.
Creating Your Student Account
- Go to the Notion website (www.notion.com ) and click on the “Sign up” button in the top right corner.
- You’ll see options to sign up with your email or through Google (perfect if you already use Google for school).
- If you choose email, enter your school email address to potentially qualify for educational benefits, then create a secure password.
- Check your inbox for Notion’s verification email and click the confirmation link.
- After verification, you’ll reach a welcome page where you can choose to start with a blank workspace, browse student-friendly templates, or join your class workspace if your teacher sent an invite.
- Select “For school” when asked about your primary use (you can always change this later).
Now that you’re officially set up with Notion, you’re ready to transform how you manage your academic life!
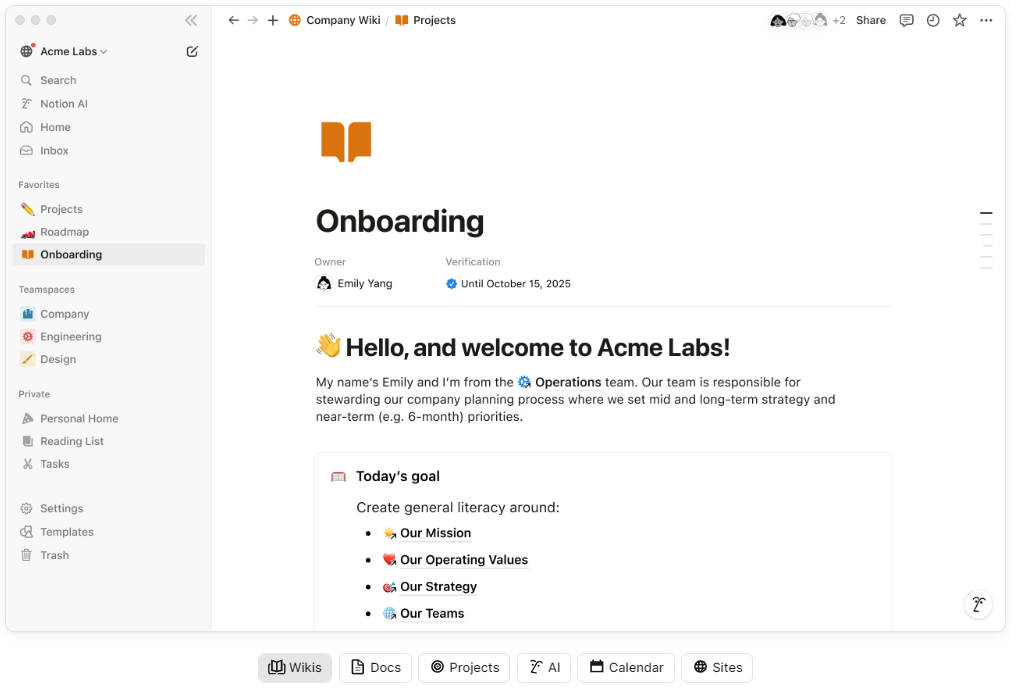
What is Notion and How Does it Work?
As a student, you’re probably juggling multiple classes, assignments, group projects, and extracurricular activities. Notion is your digital command center designed to bring order to academic chaos. It’s an all-in-one workspace where you can keep everything—lecture notes, reading assignments, project deadlines, study guides—in a single, organized place.
What makes Notion different from other apps is its building-block approach. You can create simple to-do lists for homework, design detailed study databases to track your progress across subjects, build beautiful note pages with embedded videos and images from class, and even collaborate on group projects with classmates—all without switching between multiple apps. With Notion’s drag-and-drop functionality, you can customize your workspace to match how your brain works, whether you’re a visual learner who needs everything color-coded or someone who prefers minimalist, text-focused layouts.
Notion’s Core Functionalities for Students
- Digital Note-Taking: Create searchable, organized notes for each class with the “Notes” template. Easily format your content with headings, bullet points, and embedded media to make studying more effective.
- Academic Planning: Use the “Planner” template to track assignments, exams, and personal commitments in calendar, timeline, or list views. Set reminders for important deadlines and visualize your semester at a glance.
- Research Organization: With the “Research” template, collect sources, organize citations, and develop paper outlines all in one workspace. Create databases to track your literature review progress.
- Group Collaboration: The “Group Projects” template helps you coordinate with classmates by assigning tasks, sharing files, and tracking progress—all without endless email chains or lost messages.
- Extracurricular Management: Use “Clubs and Organizations” templates to balance academic responsibilities with club meetings, volunteer work, and campus events.
- Career Development: As you progress through your academic journey, transition to using “Job Applications” templates to track internship opportunities, application statuses, and interview preparation.
These powerful yet easy-to-learn tools make Notion the ultimate student companion for staying organized across all your classes and activities.
Benefits of Using Notion
Notion is a game-changing tool that offers numerous advantages for students navigating the challenges of academic life. With its intuitive design and adaptable framework, it’s no wonder students across campuses are increasingly adopting this platform. Notion helps you stay on top of your coursework and extracurricular activities with its comprehensive organization tools.
- All-In-One Workspace: Combine notes, assignments, readings, and project materials in a single platform instead of juggling multiple apps.
- Template Versatility: Jump-start your organization with pre-built templates for notes, research papers, group projects, planners, club management, and even job applications.
- Academic Efficiency: Reduce study stress by having all your class materials organized and searchable in one place.
- Seamless Collaboration: Work with classmates on group assignments in real-time without sending multiple versions of documents back and forth.
- Personalized Learning System: Customize your workspace to match your learning style with visual boards, detailed notes, or simplified task lists.
Adaptability for Every Student
Whether you’re tracking assignments for multiple classes, researching for a thesis paper, or managing club responsibilities, Notion scales to fit your specific needs. Start simple with basic notes, then expand into complex project management as you become more comfortable.
Beyond the Classroom
The skills you develop using Notion extend beyond academics. The organizational habits and digital workflows you create now will benefit you in internships, job searches, and your future career.
How to Create a Notion Account
Getting started with Notion is straightforward and takes just a few minutes. Here’s how to create your student account:
- Visit the official Notion website at notion.so
- Click the “Sign up” button in the top right corner of the homepage
- Choose how you want to sign up:
- Use your Google account (recommended if you already use Google for school)
- Sign up with your email address (consider using your school email for potential educational benefits)
- If signing up with email, create a strong password that you’ll remember
- Check your inbox for a verification email from Notion and click the confirmation link
- After verifying your account, you’ll be asked about your primary use case – select “Personal” or “School” depending on your needs
- You’ll then see template options tailored for students, including Notes, Research, Group Projects, Planner, Clubs and Organizations, and Job Applications
- Select a template that aligns with your immediate needs or start with a blank page – you can always add more templates later
Once your account is created, take some time to explore the interface and experiment with the different templates designed for student success. Notion also offers helpful tutorials in their Help Center if you need additional guidance getting started.
How to Add Content to Your Workspace
Adding content to your Notion workspace is straightforward once you understand the basics. Here’s how to get started and organize your academic materials effectively:
- Start with the right template: Choose from student-focused templates like Notes, Research, Group Projects, Planner, and Clubs and Organizations to jumpstart your organization.
- Create new pages: Click the “+” button in the left sidebar to create a new page or subpage within your workspace.
- Use building blocks: Notion works with blocks of content that you can easily add by typing “/” followed by the type of content you want (headings, bullet lists, tables, etc.).
- Import existing content: Transfer documents, PDFs, or images directly into Notion by dragging and dropping files from your computer.
- Organize with databases: Create custom databases to track assignments, reading materials, or exam schedules with different views (table, calendar, board).
- Customize your layout: Arrange your content with drag-and-drop functionality to create a workspace that matches your study style and workflow.
The beauty of Notion is its flexibility—you can start simple with basic notes and gradually build more complex systems as you become comfortable with the platform. Don’t worry about getting everything perfect immediately; your Notion workspace can evolve as your needs change throughout your academic journey.
For inspiration, explore the template gallery specifically designed for students to see how others organize their academic life.
Getting Started with Content in Notion for Students
After creating your account and logging in, you’ll need to start adding content to make Notion work for your academic needs. Here’s how to get started:
Creating Your First Pages
To begin organizing your coursework and activities:
- Click the “+ New page” button in the left sidebar
- Choose either a blank page or select from student templates like Notes, Research, or Planner
- Give your page a descriptive title (e.g., “BIO 101 Lecture Notes” or “Spring Semester Schedule”)
- Start adding content using the “/” command to access different block types
Adding Your Study Materials
Notion makes it easy to bring in content from various sources:
- Upload Files: Simply drag and drop PDF readings, assignment documents, or lecture slides directly into your Notion page. These files will be stored within Notion for easy access.
- Import Images: Add diagrams, charts, or photos by dragging them into your page or using the image block command (“/image”).
- Embed Online Resources: Paste links to YouTube tutorial videos, Google Drive documents, or educational websites directly into your page. Notion automatically creates embedded previews for many popular sites.
Organizing with Basic Blocks
Use Notion’s block system to structure your academic content:
- Type “/” followed by “heading” to create section headers for different topics
- Use “bulleted list” or “numbered list” for key points and sequential information
- Add “toggle” blocks to create expandable sections for detailed notes
- Insert “table” blocks to compare concepts or create simple spreadsheets
- Use “code” blocks to store programming assignments or code snippets
As you become more familiar with Notion, you’ll discover more advanced features to further customize your academic workspace.
Tips for Organizing Your Notion Workspace for Students
Creating an effective Notion workspace can transform your academic experience. Here are practical organization strategies tailored specifically for students:
Start with Clear Academic Categories
Organize your Notion by creating separate sections for different aspects of student life:
- Course workspaces (one per class)
- Assignment tracker
- Study materials library
- Extracurricular activities
- Personal goals and habits
Use Visual Elements for Quick Navigation
Make your workspace visually intuitive:
- Add course-specific icons to each class page (chemistry beaker, calculator, book)
- Color-code assignments by priority or subject
- Create a visual dashboard with linked icons to your most-used pages
Create a Student Hub Page
Build a central homepage that serves as your academic command center:
- Add quick links to current courses
- Display upcoming assignment deadlines
- Include a weekly schedule view
- Feature study resources you access frequently
Leverage Database Views for Different Scenarios
Take advantage of Notion’s powerful database features:
- Use Calendar view to visualize assignment due dates
- Create a Kanban board for tracking assignment progress
- Set up Table view for comprehensive course information
- Apply filters to focus on high-priority or upcoming work
Develop a Consistent Structure
Standardize how you organize each course:
- Syllabus and course information
- Weekly lecture notes
- Assignment tracker
- Study materials and resources
- Project documentation
Refine Over Time
Your Notion workspace should evolve as you progress through your academic journey:
- Schedule monthly reviews to eliminate unnecessary pages
- Adjust your system at the beginning of each semester
- Archive completed courses instead of deleting them
Remember that the perfect Notion workspace isn’t built in a day. Start with the basics that support your immediate academic needs, then gradually expand as you become more comfortable with the platform.
Advanced Features for Creating Templates in Notion for Students
Notion’s template capabilities can significantly enhance your academic organization once you move beyond the basics. Here’s how to leverage advanced template features to streamline your student workflow:
Creating Custom Course Templates
Save time at the beginning of each semester by creating a standardized course template:
- Design a page with all your essential course elements (syllabus section, weekly notes structure, assignment tracker)
- Click the three dots in the upper right corner and select “Turn into template”
- Name it something clear like “Course Dashboard Template”
- Access this template whenever you add a new class by clicking the “+” button
Setting Up Assignment Templates
Create templates for different assignment types to maintain consistency:
- Design separate templates for essays, lab reports, problem sets, and group projects
- Include sections like requirements, resources, drafts, and submission details
- Add customizable property fields for due dates, course associations, and priority levels
Using Database Templates for Academic Tracking
Leverage database templates to monitor your academic progress:
- Create a master assignment database with customized views (calendar for deadlines, board for progress tracking)
- Design a grade tracker template with formulas to calculate your current average
- Build a study session template with toggles for different subjects and review materials
Duplicating and Modifying Existing Pages
Quickly iterate on successful organizational systems:
- Right-click on any well-structured page in your sidebar
- Select “Duplicate” to create an exact copy
- Modify the new version without affecting your original setup
Sharing Templates with Study Groups
Collaborate more effectively by sharing your best templates:
- Develop a group project template with designated sections for each team member
- Export your template to share with classmates for consistent project management
- Import templates created by others to enhance your own organizational system
These advanced template features help you create a scalable system that grows with your academic needs while saving time on repetitive setup tasks.
How to Share Your Work with Others Using the Collaboration Features of Notion for Students
Notion’s collaboration capabilities make group projects, study sessions, and academic teamwork significantly more streamlined. Here’s how to effectively share your Notion workspace with classmates and professors:
Sharing Your Academic Workspaces
- Navigate to any page you want to share (like group project notes or study guides)
- Click the “Share” button in the top-right corner of your screen
- Enter your classmates’ email addresses (school emails work best)
- Add a personalized message explaining what you’re sharing
Setting Appropriate Permission Levels
Control exactly who can do what with your shared content:
- Can edit: Perfect for group projects where teammates need to contribute equally
- Can comment: Ideal for peer review situations or when collecting feedback on assignments
- Can view: Best for sharing notes with classmates who shouldn’t modify the original content
Real-Time Collaboration for Group Projects
Notion’s real-time editing features enhance group work:
- See who’s currently viewing the page with profile icons at the top
- Watch changes happen live as teammates edit content
- Use comments to discuss specific parts of a document without cluttering the main text
- Mention teammates with “@” to draw their attention to important updates
Creating Collaborative Study Resources
Build a shared knowledge base with your study group:
- Create a centralized database of course materials and lecture notes
- Develop a shared question bank for test preparation
- Build a collaborative research repository for group assignments
- Track shared responsibilities with a group task database
Learning to effectively use Notion’s collaboration features prepares you not only for academic success but also develops valuable skills for future workplace collaboration.
Troubleshooting Common Issues
Even the most tech-savvy students occasionally encounter challenges when using Notion. Here’s how to solve common issues you might face during your academic journey:
Loading and Performance Problems
If Notion is running slowly or pages aren’t loading properly:
- Clear your browser cache and cookies
- Try using Notion in a different browser (Chrome tends to work best)
- Use the desktop app instead of the browser version for better performance
- Close unused tabs and applications to free up system resources
Mobile Sync Issues
When your mobile Notion isn’t matching your desktop version:
- Check that you’re connected to reliable WiFi
- Force close the app and restart it
- Ensure you’re logged into the same account on all devices
- Pull down on the screen to manually refresh your content
Formatting Frustrations
If your Notion pages aren’t formatting correctly:
- Try selecting text and using the “/clear formatting” command
- Break large pages into smaller, linked subpages for easier management
- Use simple formatting for important study materials to avoid rendering issues
- Create a duplicate page to restart if formatting becomes too problematic
Database Difficulties
When your assignment trackers or study databases aren’t working properly:
- Start with simpler database structures before building complex ones
- Use the template gallery for pre-tested database configurations
- Create a backup copy before making significant changes to important databases
- Verify that all properties have appropriate formatting (dates, numbers, text)
Getting Help
If you’re still stuck:
- Visit Notion’s Help & Support center for student-specific guides
- Join student-focused Notion communities on Reddit or Discord
- Check YouTube for tutorial videos addressing your specific issue
- Use the “?” icon in the bottom right corner of Notion to contact support
Remember that most Notion issues have simple solutions, and the time invested in troubleshooting will pay off with a more organized and efficient academic workflow.
Leave a Reply